Braiding is an ancient art form, bringing a rich tapestry of styles suitable for every occasion and personality. Whether you’re a fan of the classic French braid or looking for something more intricate like the Fulani Tribal braids, this guide explores 40 different types of braids, offering step-by-step guides and styling tips to help you achieve your desired look.
Box Braids
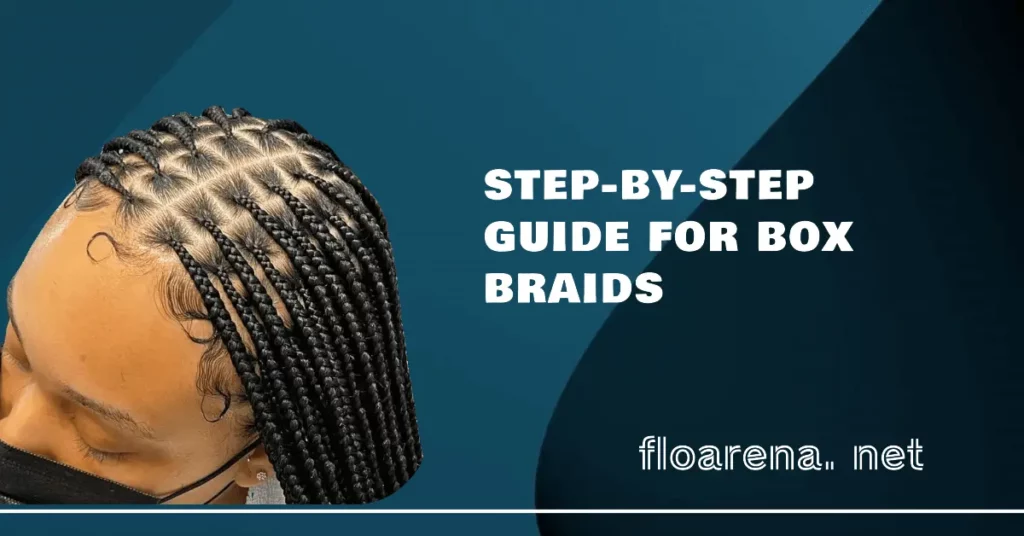
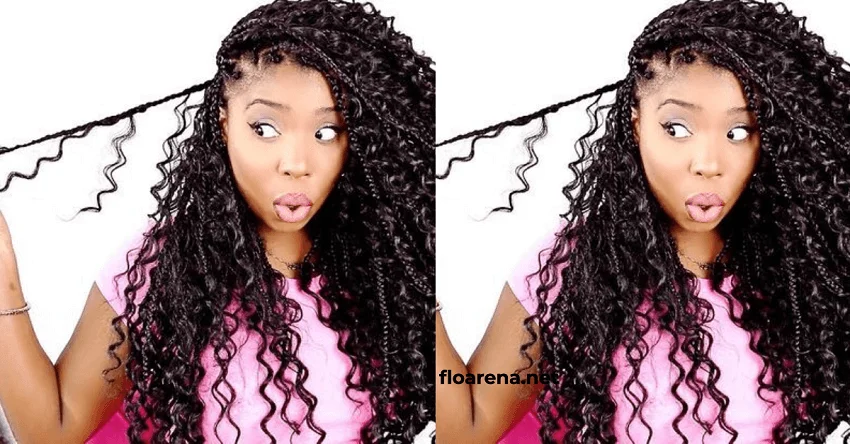
Box braids are a timeless and versatile hairstyle, known for their boxy, square-shaped divisions. They’re a fantastic protective style, allowing for less daily manipulation of the hair, which promotes growth and health. What makes box braids special is their adaptability – they suit any occasion, can be dressed up or down, and come in various sizes and lengths to match your style preference.

Step-by-Step Guide for Box Braids
- Section the Hair: Start by sectioning your hair into small, square-shaped parts.
- Prepare the Extensions: Take your hair extensions and fold them in half to create a loop at the top.
- Braiding: Place the looped extension under the sectioned hair, creating three strands for braiding. Braid the hair tightly, incorporating the extensions with your natural hair.
- Secure the Ends: Continue braiding until you reach the end of the hair, and secure it with a hairband or by burning the tips, depending on the type of extension used.
Styling Tips for Box Braids
- Accessorize: Add beads, threads, or shells to give your braids a unique touch.
- Updo Styles: Experiment with buns, ponytails, or half-up, half-down styles for different looks.
- Scalp Care: Keep your scalp moisturized and clean to maintain the health of your hair while in braids.
Goddess Braids
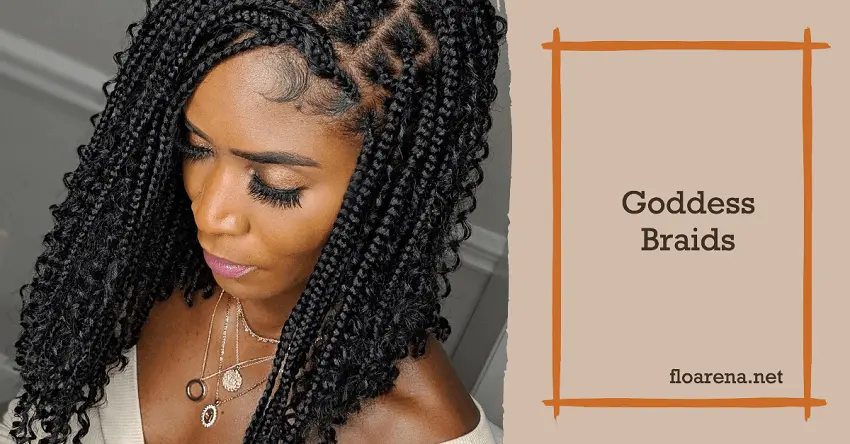
Goddess braids are large, cornrow-like braids that sit on top of the scalp. They’re a stunning and regal hairstyle, often adorned with gold cuffs or beads, making them a statement of elegance and strength. The beauty of Goddess braids lies in their versatility – they can be styled in numerous ways, from updos to ponytails, and suit every hair texture and length.
Goddess Braids: Step-by-Step Guide
- Sectioning: Start by sectioning your hair into large parts, depending on the number of braids you want.
- Apply Hair Gel: Apply a generous amount of hair gel to each section to smooth the hair and prevent flyaways.
- Braiding: Begin braiding the hair close to the scalp, gradually adding hair to the braid as you move downwards.
- Secure the End: Once you reach the end of the hair, secure the braid with a hairband or hair cuff.
Styling Tips
- Accessorize: Add gold cuffs, beads, or rings to elevate the look of your Goddess braids.
- Moisturize: Regularly moisturize your hair and scalp to keep the braids looking fresh and healthy.
- Experiment with Patterns: Try different braid patterns and partings for a unique and personalized look.

Knotless Braids
Knotless braids, as the name suggests, are a variation of box braids without the small knot at the base. This style offers a more natural and seamless look, reducing tension at the roots, which makes them a more comfortable and healthier option. The charm of knotless braids is their lightweight feel and the ability to style them in various ways without stressing the scalp.
Knotless Braids Step-by-Step Guide
- Prepping the Hair: Start with clean, detangled hair, and section it off into the desired size of the braids.
- Feeding in the Extensions: Begin braiding with your natural hair and gradually feed in the extensions as you go down, ensuring a seamless transition.
- Securing the Ends: Continue braiding to the ends and secure with a small rubber band or by sealing the tips, depending on the extension type.
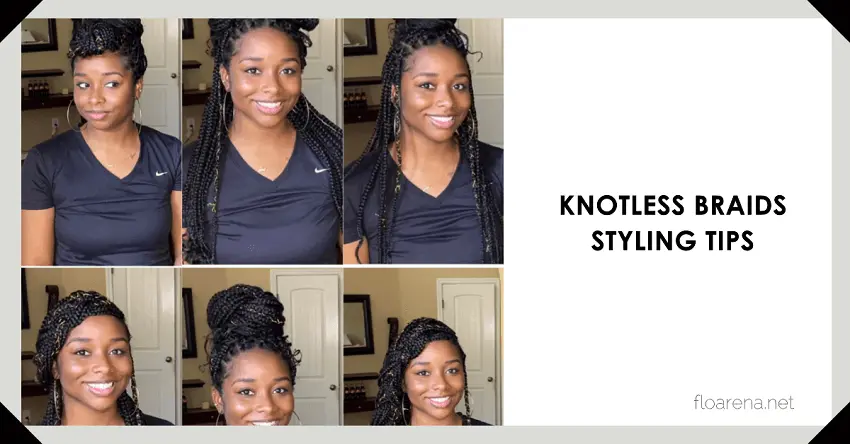
Knotless Braids Styling Tips
- Play with Lengths: Experiment with different lengths, from shoulder-length to waist-length, to change up your look.
- Add Color: Incorporate colored extensions for a vibrant and dynamic style.
- Half Up, Half Down: This style is perfect for a half-up, half-down look, showcasing the versatility of knotless braids.
Bubble Braids
Bubble braids are a fun and playful hairstyle, characterized by a series of hair “bubbles” formed by securing the hair at regular intervals. This style is relatively easy to create and offers a chic and modern look, making it a popular choice for casual and formal events alike. The distinctive feature of bubble braids is their voluminous and textured appearance, adding an element of intrigue to your hairstyle.
Step-by-Step Guide
- Create a Ponytail: Start by gathering your hair into a high or low ponytail, depending on your preference.
- Forming Bubbles: Secure the ponytail with hair elastics at regular intervals, and gently tug on the hair between the elastics to create the “bubbles.”
- Finishing Touches: Adjust the size of the bubbles to your liking and secure any loose strands with bobby pins.

Styling Tips
- Accessorize: Add hair rings or ribbons between the bubbles for an extra touch of style.
- Vary Bubble Sizes: Play around with different bubble sizes within the same braid for a unique look.
- Texture: Add texture to the hair using a texturizing spray for a more voluminous appearance.
Lemonade Braids
Lemonade braids, popularized by Beyoncé, are a type of side-swept cornrow braids that make a bold style statement. They are known for their sleek appearance and the ability to be customized with different sizes, lengths, and colors. Lemonade braids stand out for their asymmetrical styling, offering a trendy and glamorous look.
Step-by-Step Guide for Lemonade Braids
- Parting: Create a deep side part and section the hair diagonally for the braids.
- Braiding: Begin braiding each section, staying close to the scalp, and adding hair as you proceed.
- Securing Ends: Secure the ends of the braids with hair bands or by sealing the tips.
Styling Tips for Lemonade Braids

- Go Bold with Colors: Experiment with bold and vibrant colors to make your Lemonade braids pop.
- Accessorize: Add beads, cuffs, or hair jewelry to enhance the glam factor of your braids.
- Varying Sizes: Mix and match different braid sizes for a dynamic and textured look.
Pop Smoke Braids
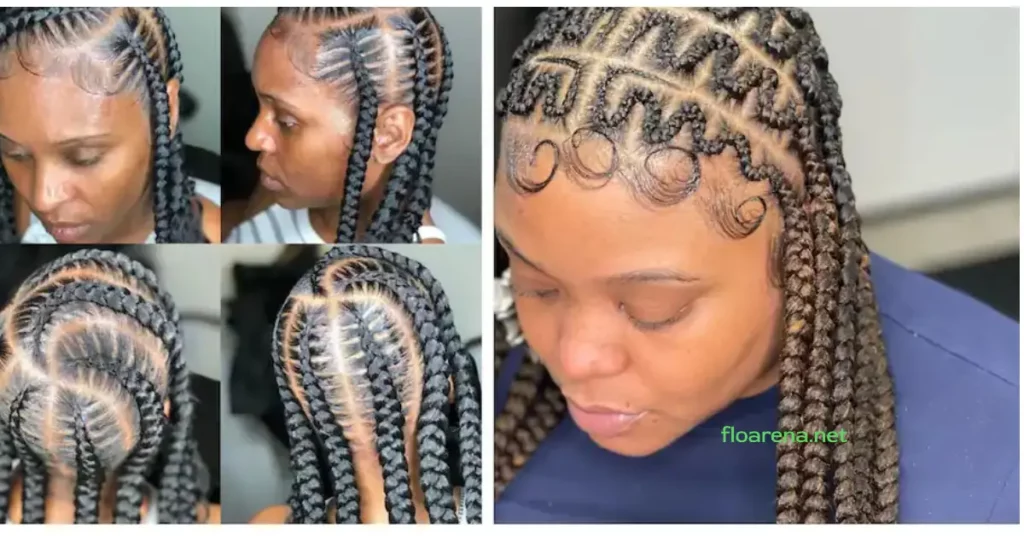
Named after the late rapper Pop Smoke, these braids are characterized by their distinctive pattern, often resembling a spider web or a star. This unique style reflects individuality and boldness, making a strong statement wherever you go. The specialty of Pop Smoke braids is their intricate design, showcasing a blend of creativity and precision.
Guide for Pop Smoke Braids
- Design Planning: Start by sketching or deciding on the pattern you want to achieve on your scalp.
- Sectioning: Section the hair according to the planned design, ensuring each part is neat and precise.
- Braiding: Braid each section tightly, following the pattern, and secure the ends with suitable bands or beads.
Styling Tips for Smoke Braids
- Play with Thickness: Experiment with different braid thicknesses to add dimension to the design.
- Accessorize Wisely: Choose accessories that complement the pattern without overwhelming it.
- Maintain the Scalp: Keep the scalp clean and moisturized to maintain the style’s neatness.
Tribal Braids
Tribal braids are deeply rooted in African culture, symbolizing various aspects of identity, community, and lifestyle. These braids are known for their intricate patterns, beads, and accessories, often telling a story or representing cultural significance. The uniqueness of tribal braids lies in their ability to connect heritage with contemporary fashion.
Step-by-Step Guide for Tribal Braids
- Inspiration Research: Explore different tribal braid designs and patterns, drawing inspiration from traditional styles.
- Sectioning and Parting: Section the hair into the desired pattern, paying attention to the thickness and direction of each braid.
- Braiding and Accessorizing: Braid the hair tightly and incorporate beads, shells, or metal cuffs as you go.

Styling Tips Tribal Braids
- Embrace Culture: Understand the meaning behind different accessories and patterns, and embrace the cultural significance.
- Experiment with Lengths: Try varying lengths to discover what complements your features best.
- Balance the Look: If the braids are intricate, keep the accessories minimal and vice versa.
Boho Braids

Boho braids exude a sense of effortless chic and free-spiritedness, making them perfect for a relaxed and natural look. Often loose and adorned with flowers or beads, these braids are synonymous with festival style and summer vibes. What makes boho braids special is their versatility – they can be incorporated into updos, down styles, or even combined with other braid types.
Step-by-Step Guide: Boho Braids
- Texture Creation: Start by creating texture in your hair using sea salt spray or by curling it lightly.
- Loose Braiding: Create loose and irregular braids, leaving strands out for a more relaxed look.
- Accessorizing: Add flowers, beads, or ribbons to enhance the bohemian vibe.
Styling Tips for Boho Braids
- Mix and Match: Combine different braid types and sizes for a more dynamic look.
- Natural Elements: Incorporate natural elements like flowers or leaves for an authentic boho style.
- Loose Strands: Leave a few strands out around the face to frame it and enhance the relaxed vibe.
Crochet Braids
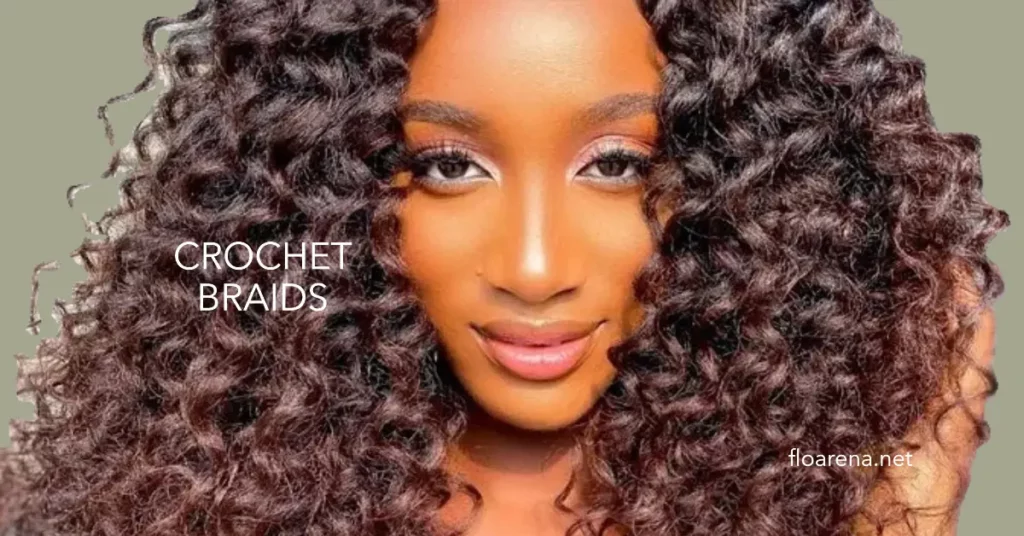
Crochet braids are a versatile and protective hairstyle, where hair extensions are crocheted into the natural hair that has been braided into cornrows. This style is celebrated for its low maintenance and the endless variety of textures and colors you can experiment with. The appeal of crochet braids lies in their ability to achieve voluminous and textured looks without putting too much strain on the natural hair.
Step-by-Step Guide: Crochet Braids
- Cornrow Base: Start by braiding your natural hair into cornrows as the base for the crochet braids.
- Installing Extensions: Using a crochet hook, loop the hair extensions through the cornrows and secure them.
- Styling: Trim and style the extensions as desired, whether curly, wavy, or straight.
Styling Tips: Crochet Braids
- Texture Variety: Explore different textures of hair extensions to achieve diverse looks, from curly to straight.
- Color Play: Incorporate colored extensions for a vibrant and personalized appearance.
- Maintenance: Keep the scalp clean and moisturized, and avoid heavy products on the extensions.
French Braids
French braids are a classic and elegant hairstyle, characterized by their intricate weaving that starts from the crown of the head. They are suitable for various occasions, from casual outings to formal events, and are known for their ability to keep the hair neat and tidy. The charm of French braids is in their universality and the elegant silhouette they create.
Step-by-Step Guide for French Braids
- Sectioning at the Crown: Begin by taking a section of hair from the crown and dividing it into three strands.
- Progressive Braiding: Start braiding by adding more hair to each strand as you work your way down.
- Securing the End: Once you reach the nape of the neck, continue with a regular braid and secure the end with a hairband.
Styling Tips for French Braids
- Loose or Tight: Adjust the tightness of the braid for either a relaxed or a more polished look.
- Accessorize: Add ribbons, flowers, or hairpins for a touch of elegance or playfulness.
- Double Up: Consider doing two French braids for a symmetrical and balanced style.
Stitch Braids
Stitch braids are a type of cornrow that have a raised, stitched appearance, achieved by using a styling tool to separate sections of hair as you braid. This technique results in a clean and geometric look, making stitch braids a popular choice for those seeking a sleek and stylish appearance. The distinctiveness of stitch braids is in the precision and the sharp lines that define this style.
Step-by-Step Guide for Stitch Braids
- Precise Parting: Section the hair into clean, straight parts, ensuring each section is even.
- Braiding with a Styling Tool: Use a styling tool to separate small sections of hair as you cornrow, creating the ‘stitch’ effect.
- Finishing: Secure the ends neatly and apply edge control for a sharp finish.
Styling Tips for Stitch Braids
- Geometric Patterns: Experiment with different parting patterns for a unique and geometric look.
- Accessorize: Add hair cuffs or beads along the braids for added style.
- Maintain Straight Lines: Use a rat-tail comb for precise parting and straight lines.
Dutch Braids
Dutch braids, often referred to as “reverse French braids,” create a beautiful raised appearance as the braid sits on top of the hair. This style is versatile, suitable for casual wear or more formal occasions, and can be dressed up with accessories or left simple and elegant. The allure of Dutch braids is the 3D effect they create, adding depth and dimension to the hairstyle.
Step-by-Step Guide for Dutch Braids
- Sectioning the Hair: Begin at the hairline and divide the starting section into three equal parts.
- Braiding Technique: Instead of crossing the strands over as in a French braid, cross them under each other, adding more hair to each strand as you move down the head.
- Finishing the Braid: Once all the hair is incorporated, continue with a regular three-strand braid until the end and secure it with a hair tie.
Styling Tips for Dutch Braids
- Experiment with Size: Create either one big Dutch braid or multiple smaller ones for varied looks.
- Accessorize: Integrate hair rings, flowers, or ribbons for added flair.
- Loosen Up: Gently pull at the sides of the braid after braiding for a fuller and more relaxed appearance.
Micro Braids
Micro braids are tiny, delicate braids that can be styled in countless ways, from leaving them down to creating intricate updos. They are a commitment, given the time it takes to create them, but they offer a low-maintenance and versatile hairstyle for several months. The specialty of micro braids is their delicate nature, allowing for movement and flexibility in styling.
Step-by-Step Guide for Micro Braids
- Preparation: Start with clean, dry, and detangled hair, and section it off into very small parts.
- Braiding: Carefully braid each small section from the root to the end, ensuring uniformity in size.
- Sealing Ends: Depending on the hair type, seal the ends by dipping them in hot water or using hair bands.
Styling Tips for Micro Braids
- Protective Styling: Use micro braids as a base for other protective styles like buns or updos.
- Scalp Care: Regularly oil the scalp to prevent dryness and itching due to the small size of the braids.
- Avoid Overloading: Given their small size, avoid heavy products and excessive washing to maintain the braids.
Peekaboo Braids
Peekaboo braids are subtle braids hidden amongst the rest of the hair, adding an element of surprise and interest to the hairstyle. They are perfect for those who want to experiment with braiding without committing to a full head of braids. The charm of peekaboo braids is in their ability to add a playful and unexpected twist to any hairdo.
Step-by-Step Guide for Peekaboo Braids
- Selecting Sections: Choose a few sections of hair, preferably underneath the top layer, to create the braids.
- Braiding: Braid the selected sections into any preferred braid type and secure the ends.
- Styling the Rest of the Hair: Style the unbraided hair as usual, allowing the peekaboo braids to subtly show through.
Styling Tips for Peekaboo Braids
- Colorful Strands: Incorporate colorful strands or extensions for the peekaboo braids for a vibrant effect.
- Various Braid Types: Experiment with different types of braids for the peekaboo sections.
- Placement Variation: Place the peekaboo braids in different areas for each wear, keeping the look fresh and dynamic.
Coi Leray Braids
Coi Leray braids, inspired by the artist Coi Leray, are recognized for their distinctiveness and playful vibe. These braids are typically longer, often featuring colorful beads and accessories, representing a bold and youthful style. The uniqueness of Coi Leray braids stems from their ability to express individuality and a sense of carefree fashion.
Step-by-Step Guide
- Choosing Extensions: Select long hair extensions, possibly in different colors for a vibrant look.
- Sectioning and Braiding: Create sections of varying sizes and start braiding, incorporating the extensions.
- Accessorizing: Add colorful beads, cuffs, or other accessories to each braid, securing the ends.
Styling Tips
- Varying Thickness: Mix thin and thick braids for a dynamic and textured appearance.
- Color Play: Don’t shy away from bold and contrasting colors for a standout look.
- Loose Ends: Leave the ends of the braids loose for a more relaxed and playful vibe.
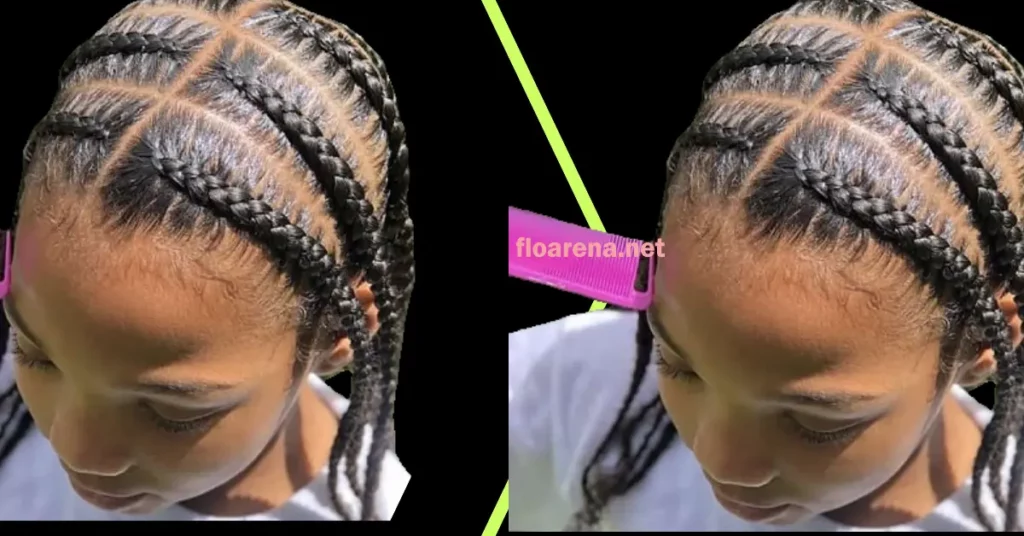
Cornrow Braids
Cornrow braids are a traditional African style of hair grooming where the hair is braided very close to the scalp, using an underhand, upward motion to produce a continuous, raised row. Cornrows are often formed in simple, straight lines, but they can also be formed in detailed geometric or curvilinear designs. The versatility and protective nature of cornrow braids make them a popular choice for many.
Step-by-Step Guide for Cornrow Braids
- Planning the Pattern: Decide on the design or pattern of the cornrows, whether straight or geometric.
- Sectioning: Based on the design, section the hair neatly and start braiding close to the scalp.
- Securing the Braids: Braid each section until the end and secure it, ensuring uniformity across all braids.
Styling Tips for Cornrow Braids
- Accessorize: Incorporate beads, shells, or hair rings for a personalized touch.
- Maintain Scalp Health: Keep the scalp moisturized and clean to maintain the style and prevent itching.
- Experiment with Designs: Try different geometric patterns and designs for a unique look each time.
Viking Braids
Viking braids are inspired by historical Norse warriors and are characterized by their rugged and bold appearance. These braids are often thicker, messier, and incorporate elements like leather or metal, reflecting a sense of strength and adventure. The appeal of Viking braids is in their ability to convey a powerful and fearless persona.
Step-by-Step Guide for Viking braids
- Creating Texture: Start by adding texture to the hair using texturizing products or by teasing it.
- Forming Thick Braids: Section the hair into larger parts and create thick, somewhat loose braids.
- Rugged Accessories: Integrate rugged elements like leather strips or metal rings into the braids.
Styling Tips for Viking braids
- Messy Look: Embrace a messier and more relaxed braiding style for an authentic Viking appearance.
- Varied Thickness: Combine different braid thicknesses for a more dynamic and rugged look.
- Bold Accessories: Choose bold and rustic accessories to complement the Viking theme.
Jumbo Braids
Jumbo braids are large, bold, and make a striking statement. Known for their size and simplicity, these braids offer a chic and modern look while being relatively quick to install compared to smaller braids. The standout feature of jumbo braids is their voluminous appearance, which can be worn in various styles, from ponytails to buns.
Step-by-Step Guide: Jumbo Braids
- Sectioning Large Parts: Divide the hair into large sections, ensuring each is detangled and smoothed out.
- Braiding: Braid each section, incorporating hair extensions if additional length or volume is desired.
- Securing the Ends: Secure the ends of the braids with hair bands or by sealing them appropriately.
Styling Tips: Jumbo Braids
- High Ponytail: Gather the jumbo braids into a high ponytail for an elegant and elongated look.
- Accessorize: Add large beads, cuffs, or hair wraps to enhance the braids’ visual appeal.
- Scalp Care: Due to the braids’ weight, regularly moisturize and massage the scalp to maintain its health.
Butterfly Braids

Butterfly braids are a stylish and sophisticated hairstyle, characterized by the illusion of a butterfly’s wings created by the loose and wispy strands along the braid. This enchanting style is versatile, suitable for both casual and formal occasions. The magic of butterfly braids lies in the delicate balance between structure and whimsicality.
Step-by-Step Guide for Butterfly Braids
- Forming the Base: Start with two large sections of hair and begin braiding them together loosely.
- Creating Wisps: As you braid, leave out small strands of hair to create the “butterfly” effect.
- Finishing Touches: Secure the end of the braid and use a curling iron to style the wispy strands.
Styling Tips for Butterfly Braids
- Texture and Volume: Add texture and volume to the braid for a more dramatic butterfly effect.
- Hair Jewelry: Adorn the braid with subtle hair jewelry or flowers for added elegance.
- Soft Curls: Curl the wispy strands softly for a romantic and delicate appearance.
Jayda Wayda Braids
Inspired by the influencer Jayda Wayda, these braids are synonymous with trendiness and flair. Often featuring vibrant colors, unique patterns, and eye-catching accessories, Jayda Wayda braids are for those who love to make a fashion statement. The allure of these braids is their ability to merge traditional braiding with contemporary style elements.
Step-by-Step Guide for Jayda Wayda Braids
- Choosing a Design: Explore different braid patterns, colors, and accessories inspired by Jayda Wayda’s looks.
- Braiding and Accessorizing: Execute the chosen design, incorporating any desired colors and accessories as you braid.
- Final Styling: Adjust the length, trim any loose ends, and ensure the accessories are secured.
Styling Tips for Jayda Wayda Braids
- Bold Color Choices: Experiment with bold and unconventional colors to replicate Jayda Wayda’s vibrant style.
- Unique Patterns: Opt for distinctive and intricate braid patterns for a standout look.
- Statement Accessories: Choose accessories that add to the overall impact of the hairstyle, such as large beads or metallic cuffs.
African Braids
African braids encompass a diverse range of braiding techniques and styles, each with its own cultural significance and history. These braids are not just a hairstyle but a representation of identity, tradition, and heritage. The richness of African braids lies in their variety, intricate patterns, and the stories they tell.

Step-by-Step Guide for African Braids
- Research and Respect: Learn about different African braid styles and their meanings, ensuring cultural appreciation and respect.
- Sectioning and Braiding: Depending on the chosen style, section the hair and start braiding, incorporating traditional patterns and techniques.
- Accessorizing Traditionally: Add traditional accessories like beads, shells, or metal cuffs to enhance the authenticity of the style.
Styling Tips for African Braids
- Cultural Appreciation: Wear African braids with knowledge, respect, and appreciation for the culture they represent.
- Diverse Styles: Explore the diversity of African braids, from Fulani braids to Bantu knots, each with its unique beauty.
- Proper Maintenance: Care for the braids by keeping the scalp moisturized and avoiding excessive tension.
Tree Braids
Tree braids are a protective hairstyle that combines cornrows and loose hair strands, giving the illusion of a full head of hair with the benefits of a braided base. This style is versatile, allowing for various textures, lengths, and styling options. The appeal of tree braids is in their ability to offer a natural and free-flowing look while protecting the natural hair.
Step-by-Step Guide for Tree Braids
- Cornrow Base: Start by creating cornrows, leaving out sections of the extensions to hang free.
- Integrating Loose Hair: As you braid each cornrow, incorporate loose hair strands, ensuring even distribution.
- Styling the Loose Hair: Once the braiding is complete, style the loose hair as desired, whether curly, straight, or wavy.
Styling Tips for Tree Braids
- Varying Textures: Experiment with different textures of hair extensions for varied looks.
- Layered Styling: Cut and layer the loose hair for a more structured and styled appearance.
- Moisturize and Protect: Regularly moisturize the scalp and protect the loose hair at night with a silk scarf.
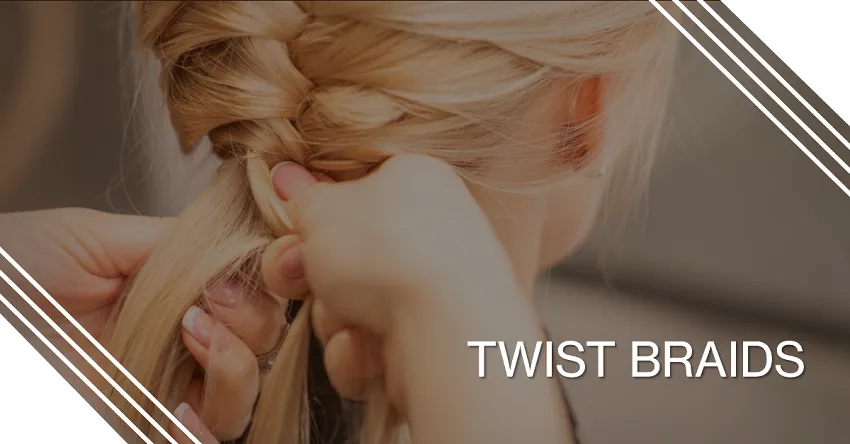
Twist Braids
Twist braids, also known as two-strand twists, are a popular protective hairstyle where two sections of hair are twisted together from root to tip. This style is versatile, easy to maintain, and can be worn in various lengths and thicknesses. The simplicity and elegance of twist braids make them a timeless choice for many.
Step-by-Step Guide for Twist Braids
- Sectioning: Divide the hair into sections of the desired size, ensuring each is detangled.
- Twisting: Take two strands of hair (or hair extensions) and twist them around each other from root to tip.
- Securing the Ends: Secure the ends of the twists with hair bands or by sealing them, depending on the hair type.
Styling Tips for Twist Braids
- Size Variation: Create twist braids of different sizes for a textured and dynamic look.
- Accessorize: Add beads, cuffs, or hair rings to individual twists for added style.
- Updos and Buns: Style the twist braids into updos, buns, or ponytails for versatile looks.
Butter Braids
Butter braids, known for their soft and smooth texture, are reminiscent of a pastry due to their layered appearance. This style is elegant and versatile, making it suitable for various occasions. The special feature of butter braids is the intricate layering, giving the illusion of a woven masterpiece.
Step-by-Step Tutorial for Butter Braids
- Preparation: Ensure the hair is well-moisturized and detangled to achieve the smooth texture.
- Sectioning and Layering: Divide the hair into sections and start braiding, incorporating the layering technique for a woven effect.
- Finishing Touch: Secure the ends neatly and apply a light hair spray for hold and shine.
Styling Tips for Butter Braids
- Elegance is Key: Keep the style elegant and neat, with well-defined layers.
- Subtle Accessories: Opt for subtle and elegant accessories like pearls or small hairpins.
- Maintain Smoothness: Regularly moisturize the hair to maintain the smooth and soft texture.
Drake Braids
Inspired by the artist Drake, these braids are characterized by their simplicity and clean lines, often accompanied by a faded undercut. Drake braids are a representation of a modern and sleek style, suitable for those seeking a low-maintenance yet trendy look. The appeal of Drake braids is in their minimalist design and the sharp contrast they create with the undercut.
Step-by-Step Tutorial for Drake Braids
- Undercut Preparation: Start with a clean and even undercut, ensuring the top hair is long enough for braiding.
- Braiding: Braid the top hair into neat and straight cornrows, securing the ends.
- Maintaining the Undercut: Regularly trim the undercut to maintain the sharpness of the style.
Styling Tips for Drake Braids
- Sharp Lines: Keep the braids and the undercut lines sharp and clean for a polished look.
- Minimalism: Avoid excessive accessories and keep the style minimalist and modern.
- Scalp Care: Due to the exposed undercut, ensure the scalp is well-moisturized and protected from the sun.
Individual Braids
Individual braids are a classic and versatile style where each section of hair is braided independently, allowing for greater movement and flexibility. This style is protective and can be worn in various lengths, thicknesses, and colors. The beauty of individual braids lies in their versatility and the endless styling options they offer.
Step-by-Step Guide
- Sectioning: Divide the hair into individual sections of the desired size, ensuring even parting.
- Braiding: Braid each section independently from the root to the tip, incorporating extensions if desired.
- Securing Ends: Secure the ends of the braids using suitable methods, depending on the hair type and length.
Styling Tips for Individual Braids
- Experiment with Length: Try different lengths, from short bob braids to waist-length, for varied looks.
- Accessorize: Add beads, shells, or colorful threads to individual braids for a personalized touch.
- Updos and Loose Styles: Wear the braids in updos, ponytails, or let them flow freely for diverse styles.
ASAP Rocky Braids
ASAP Rocky braids, inspired by the rapper, are synonymous with a cool, edgy, and urban style. These braids are often characterized by unique patterns, designs, and sometimes incorporate colored beads or threads. The distinctiveness of ASAP Rocky braids is their ability to blend traditional braiding with a contemporary and stylish twist.
Step-by-Step Guide ASAP Rocky Braids
- Design Selection: Choose a unique and stylish pattern or design inspired by ASAP Rocky’s looks.
- Braiding Process: Execute the chosen design with precision, ensuring clean lines and even braids.
- Accessorizing: Add beads, colored threads, or other accessories for an additional style statement.
Styling Tips ASAP Rocky Braids
- Edgy and Bold: Don’t shy away from bold designs and patterns to achieve the edgy look.
- Color Accents: Incorporate colored accessories or threads for a vibrant and urban feel.
- Clean Lines: Maintain clean and sharp lines for a polished and stylish appearance.
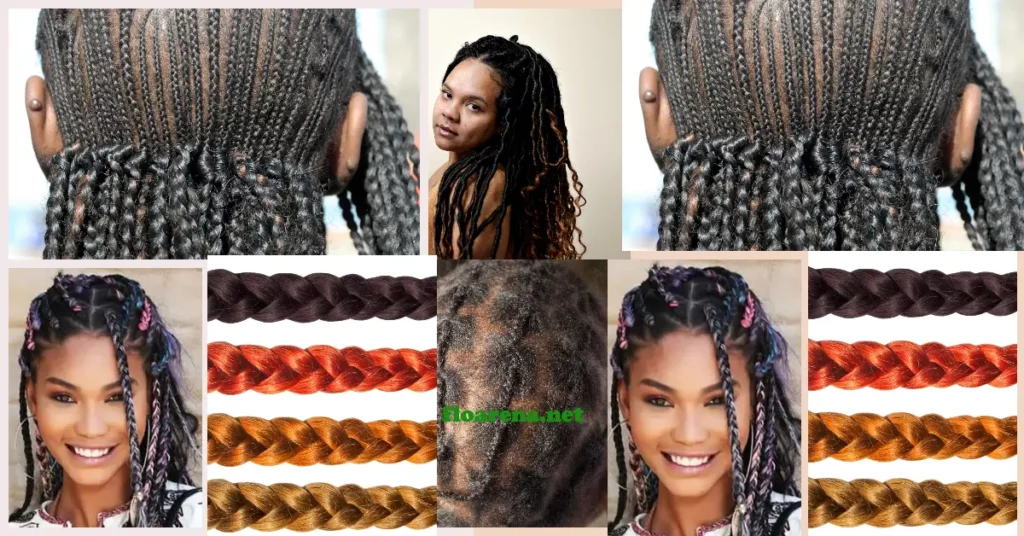
Colored Braids
Colored braids are a fun and vibrant way to express individuality and creativity through hair. Whether it’s bold rainbow hues, pastel tones, or natural colors, the possibilities are endless. The allure of colored braids is the visual impact they create, allowing for personal expression and a unique style statement.
Step-by-Step Guide
- Color Selection: Decide on the color palette, whether going for bold, pastel, or natural tones.
- Hair Preparation: If using colored extensions, prepare the natural hair by braiding it into the desired style.
- Incorporating Color: Integrate the colored extensions or strands evenly throughout the braids.
Styling Tips
- Harmonious Palette: Choose colors that harmonize well together for a cohesive look.
- Varying Shades: Experiment with different shades of the same color for a gradient effect.
- Accessorize: Complement the colored braids with accessories that enhance the color scheme.
Criss Cross Braids
Criss cross braids, characterized by their intersecting patterns and geometric designs, are a visually striking hairstyle. This style is versatile, suitable for both casual and formal settings, and allows for creativity in design. The charm of criss cross braids is in the intricate patterns and the sense of sophistication they bring.
Step-by-Step Guide for Criss Cross Braids
- Design Planning: Plan the criss cross design, considering the intersection points and overall pattern.
- Precise Sectioning: Section the hair with precision to ensure clean and even criss cross patterns.
- Braiding Technique: Braid each section carefully, following the planned design and securing the ends.
Styling Tips for Criss Cross Braids
- Geometric Creativity: Explore different geometric designs and intersection points for a unique look each time.
- Accessorize with Subtlety: Choose subtle accessories that complement the intricate design without overshadowing it.
- Maintain Symmetry: Ensure the criss cross patterns are symmetrical and even for a polished appearance.
Ghana Braids
Ghana braids, also known as banana cornrows, are a traditional African hairstyle characterized by their unique cornrow technique which results in raised braids. The style often features extensions woven in to create longer, thicker, and more vibrant braids. The allure of Ghana braids is their cultural richness and the captivating patterns they form on the scalp.
Step-by-Step Guide for Ghana Braids
- Sectioning with Precision: Carefully section the hair, considering the desired thickness and pattern of the braids.
- Feeding in Extensions: Start braiding close to the scalp, gradually feeding in extensions for added length and thickness.
- Securing the Ends: Braid down to the ends and secure them, ensuring uniformity across all the braids.
Styling Tips for Ghana Braids
- Play with Sizes: Mix different sizes of braids for a dynamic and textured look.
- Accessorize Traditionally: Add traditional African beads or metal cuffs for an authentic touch.
- Scalp Care: Regularly oil the scalp to prevent dryness and itching, ensuring the style remains neat.
Fishtail Braids
Fishtail braids, known for their intricate herringbone pattern, are a classic and elegant hairstyle. This style is versatile, suitable for casual days out or special occasions, and can be worn in various ways, from side fishtails to half-up styles. The beauty of fishtail braids is in the delicate weaving of small sections of hair, creating a mesmerizing pattern.
Step-by-Step Guide
- Dividing Sections: Split the hair into two main sections, then take a small strand from the outer edge of one section and cross it over to the other.
- Weaving Pattern: Continue this process, alternating sides and incorporating smaller strands, until reaching the end.
- Securing the Braid: Secure the end of the braid with a hair tie, and gently loosen the woven strands for a fuller appearance.
Styling Tips
- Loose for Volume: Loosen the strands of the braid after braiding for a more voluminous and casual look.
- Accessorize Elegantly: Choose elegant accessories like ribbons or pearls to enhance the braid’s elegance.
- Experiment with Placement: Try different fishtail placements, like side braids or crown braids, for varied looks.
Layered Braids
Layered braids create a multi-dimensional look by incorporating braids of different lengths and sizes. This style is dynamic and can add volume and interest to the overall hairstyle. The appeal of layered braids is the depth and texture they add, making the hair appear fuller and more intricate.
Step-by-Step Guide
- Planning Layers: Decide on the placement and length of each layer, ensuring a harmonious balance.
- Braiding in Layers: Start braiding in sections, creating layers by varying the length and size of each braid.
- Finishing Touches: Secure the ends of each braid and adjust the layers as needed for the desired effect.
Styling Tips
- Varying Thickness: Mix thin and thick braids within the layers for added texture and volume.
- Accessorize Thoughtfully: Choose accessories that complement the layered look without overwhelming it.
- Maintain Balance: Ensure the layers are balanced and harmonious for a cohesive appearance.
Lil Braids
Lil braids are small, delicate, and versatile, allowing for a variety of styling options. This style is characterized by its numerous tiny braids, which can be adorned with beads, threads, or cuffs. The charm of Lil braids is their intricacy and the way they allow for individual expression through various accessories and styling.
Step-by-Step Guide
- Sectioning Small Parts: Carefully section the hair into numerous small parts for braiding.
- Braiding Process: Braid each small section from the root to the tip, ensuring uniformity.
- Accessorizing: Decorate the braids with small beads, threads, or cuffs for added style.
Styling Tips
- Play with Accessories: Experiment with various accessories to enhance the look.
- Versatile Styling: Style the Lil braids in updos, ponytails, or let them flow freely.
- Regular Maintenance: Keep the scalp moisturized and redo any loose braids to maintain the
Locs Braids
Locs braids are formed by matting or weaving the hair into long ropes. This style is a commitment and represents a natural and spiritual journey for many. The uniqueness of locs braids is their texture and the sense of individuality they bring, evolving and becoming more distinct over time.
Step-by-Step Guide
- Sectioning and Twisting: Section the hair into even parts and twist each section tightly.
- Palm Rolling or Interlocking: Use palm rolling or interlocking methods to start the locing process.
- Maintenance: Regularly maintain the locs by retwisting or interlocking, and keeping the scalp clean and moisturized.
Styling Tips
- Patience is Key: Be patient as locs take time to mature and develop their distinct texture.
- Accessorize with Care: Add beads or wraps to the locs, ensuring they are not too tight or heavy.
- Healthy Practices: Maintain a healthy scalp and hair routine to ensure the longevity of the locs.
Gypsy Braids
Gypsy braids are characterized by their free-spirited and bohemian vibe, often incorporating colorful threads, beads, and feathers. This style is versatile, reflecting a sense of wanderlust and a love for eclectic and unconventional beauty. The appeal of gypsy braids is in their ability to express personality and a sense of adventure.
Step-by-Step Guide
- Creating Texture: Start by creating texture in the hair, using waves or curls.
- Braiding and Accessorizing: Braid the hair loosely, incorporating colorful threads, beads, and feathers.
- Finishing Touches: Leave some strands free and wavy, and secure the braids with bands or pins.
Styling Tips
- Eclectic Accessories: Choose a variety of colorful and bohemian accessories for an authentic gypsy look.
- Loose and Free: Keep the braids loose and free, embracing a relaxed and carefree vibe.
- Mixing Textures: Mix different textures and braid sizes for a more dynamic and eclectic style.
Dreadlock Braids
Dreadlock braids are a form of locs, symbolizing a spiritual journey and a departure from conventional beauty standards. This style is created by allowing the hair to mat and knot, resulting in distinct rope-like strands. The beauty of dreadlock braids lies in their natural progression and the sense of liberation they represent.
Step-by-Step Guide
- Sectioning and Backcombing: Section the hair and backcomb each section to start the knotting process.
- Twisting and Palm Rolling: Twist and palm roll the hair regularly to encourage the formation of dreadlocks.
- Maintenance: Keep the dreadlocks clean, avoid over-washing, and regularly separate any joining locks.
Styling Tips
- Embrace the Journey: Understand that dreadlocks are a commitment and embrace the journey of their formation.
- Healthy Routine: Establish a healthy hair routine to maintain clean and healthy dreadlocks.
- Personal Expression: Use dreadlock braids as a form of personal expression and individuality.
Sonic Braids
Sonic braids, inspired by the iconic character Sonic the Hedgehog, are characterized by their bold, spiked appearance and often vibrant blue color. This playful and adventurous style is a creative way to express one’s personality and love for the character. The uniqueness of Sonic braids is their ability to capture the essence of speed and adventure associated with Sonic.
Step-by-Step Guide
- Coloring: If desired, color the hair or extensions in Sonic’s vibrant blue shade.
- Sectioning and Spiking: Section the hair and create individual braids, styling them into spikes.
- Securing and Styling: Secure the spikes and add any additional styling products or accessories to complete the look.
Styling Tips
- Bold and Vibrant: Embrace the boldness of the style with vibrant colors and strong spikes.
- Accessorize with Rings: Add golden rings as accessories to represent Sonic’s love for collecting them.
- Maintain the Spikes: Use strong-hold products to maintain the spiked appearance of the braids.
Mexican Braids
Mexican braids are deeply rooted in tradition and cultural heritage, often seen in intricate and beautifully adorned styles. These braids can be simple or complex, but they always carry a sense of pride and identity. The allure of Mexican braids is their ability to convey cultural stories and the craftsmanship involved in creating them.
Step-by-Step Tutorial for Mexican Braids
- Understanding Tradition: Learn about the traditional styles and significance of Mexican braids.
- Creating the Braids: Depending on the chosen style, create the braids with attention to detail and precision.
- Adorning with Accessories: Add traditional Mexican accessories like flowers, ribbons, or beads to enhance the style.
Styling Tips for Mexican Braids
- Respect the Culture: Approach Mexican braids with respect and appreciation for the cultural heritage they represent.
- Traditional Accessories: Incorporate traditional accessories to maintain the authenticity of the style.
- Neatness and Precision: Ensure the braids are neat and precise, reflecting the craftsmanship of traditional Mexican braiding.
Fulani Tribal Braids
Fulani tribal braids are a traditional African hairstyle, originating from the Fulani people. Known for their distinctive patterns, beads, and cowry shells, these braids are a symbol of identity and cultural heritage. The uniqueness of Fulani tribal braids is in their detailed design and the meaningful accessories incorporated into the style.
Step-by-Step Guide for Fulani Tribal Braids
- Researching the Style: Learn about the traditional patterns, designs, and accessories of Fulani tribal braids.
- Braiding and Designing: Create the braids, incorporating the distinctive Fulani patterns and designs.
- Accessorizing: Add traditional Fulani accessories such as beads, cowry shells, and metal cuffs to complete the style.
Styling Tips for Fulani Tribal Braids
- Cultural Appreciation: Wear Fulani tribal braids with knowledge and respect for the Fulani culture and traditions.
- Authentic Accessories: Use authentic Fulani accessories to enhance the cultural significance of the style.
- Maintenance: Keep the braids neat and well-maintained, paying attention to the health of the scalp and hair.
Half Up Half Down Braids
Half up half down braids offer a versatile and balanced look by combining the elegance of an updo with the casualness of free-flowing braids. This style can be adapted to suit various occasions, making it a popular choice for many. The appeal of half up half down braids is in their ability to provide the best of both worlds in terms of styling.
Step-by-Step Guide
- Sectioning the Hair: Divide the hair into two sections, upper and lower.
- Creating the Updo: Braid the upper section and style it into an updo, securing it in place.
- Styling the Lower Section: Braid the lower section, leaving the braids to flow freely or styling as desired.
Styling Tips
- Balanced Proportions: Ensure a balanced proportion between the updo and the flowing braids for a harmonious look.
- Accessorize Thoughtfully: Choose accessories that complement both aspects of the style.
- Versatile Adaptation: Adapt the style to suit different occasions, from casual to formal, by varying the updo and accessories.