Keeping your Keurig brewer running smoothly is key to great tasting coffee every time. One of the most important maintenance tasks is cleaning the internal needle that punctures the coffee pods during brewing. Follow these steps to clean your Keurig needle and prevent mineral buildup.
Key Takeaways for Cleaning the Keurig Needle:
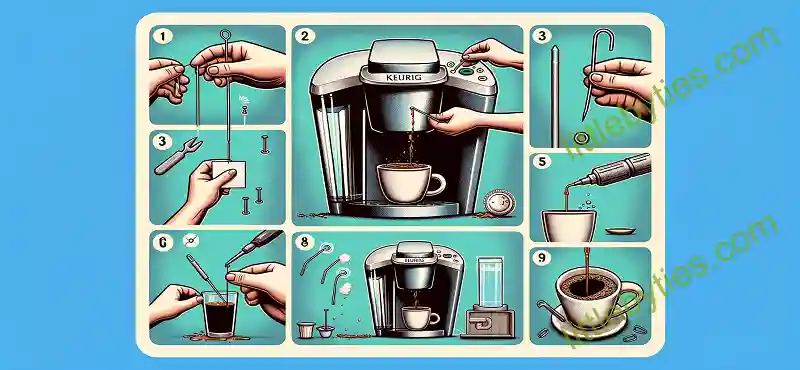
- Carefully use a paper clip or needle to dislodge any leftover coffee grounds stuck inside the needle.
- Soak just the pod holder and needle in undiluted white vinegar for 30 minutes to dissolve minerals.
- After soaking, rinse the needle several times with fresh water to remove all vinegar residue.
- Fully insert and eject the pod holder to prevent grounds getting stuck.
- Consider using distilled or filtered water to prevent mineral deposits.
- Clean the needle monthly for best results.
Step-by-Step Instructions for Cleaning the Needle:
Remove the Pod Holder
Make sure your Keurig brewer is turned off and unplugged. Lift up on the handle of the pod holder and remove it completely from the brewer. The needle that punctures the pod is located on the underside of the pod holder assembly.
Dislodge Stuck Grounds
Examine the needle for any dried coffee grounds stuck inside or around it. Use a paper clip, needle, or small tool to gently loosen and scrape away any debris lodged in the needle. Be very careful not to damage the needle in the process.
Soak in Vinegar Solution
Prepare a bath of undiluted white vinegar. Place only the pod holder and needle in the vinegar and let soak for 30 minutes. The acetic acid in the vinegar will help dissolve calcium and mineral deposits that cause buildup.
Rinse Thoroughly
After soaking, rinse the entire pod holder and needle several times with fresh clean water. This removes any remaining vinegar taste and coffee residue. Rinse until the water runs clear.
Dry and Reinsert
Allow the pod holder assembly to dry fully before tightly reinserting it back into the brewer. Test with a water-only brew cycle to flush out any lingering vinegar taste.
Helpful Tips for Preventing Needle Buildup
- Always fully descend and lift the handle when inserting and removing the pod holder. This helps prevent grounds from getting lodged inside the needle.
- Use distilled or filtered water in your Keurig to minimize mineral deposits on the needle over time.
- Clean the needle at least once per month to keep your brewer running optimally.
Regularly cleaning and maintaining the Keurig needle takes just a few easy steps but makes a big difference in coffee taste and machine performance. With proper care, your brewer will last for years of quality brewing.